The switch from Puppeteer to Playwright is easy. But is it worth it? And how exactly does one migrate existing scripts from one tool to another? What are the required code-level changes, and what new features and approaches does the switch enable?
UPDATE: you can use our puppeteer-to-playwright conversion script to quickly migrate your Puppeteer codebase to Playwright.
Puppeteer and Playwright today
While they share a number of similarities, Puppeteer and Playwright have evolved at different speeds over the last two years, with Playwright gaining a lot of momentum and arguably even leaving Puppeteer behind.
These developments have led many to switch from Puppeteer to Playwright. This guide aims to show what practical steps are necessary and what new possibilities this transition enables. Do not let the length of this article discourage you - in most cases the migration is quick and painless.
Why switch
While a comprehensive comparison of each tool’s strengths and weaknesses could fill up a guide of its own (see our previous benchmarks for an example), the case for migrating to Playwright today is rather straightforward:
- As of the writing of this guide, Playwright has been frequently and consistently adding game changing features (see below for a partial list) for many months, with Puppeteer releasing in turn mostly smaller changes and bug fixes. This led to a reversal of the feature gap that had once separated the two tools.
- Playwright maintains an edge in performance in real-world E2E scenarios (see benchmark linked above), resulting in lower execution times for test suites and faster monitoring checks.
- Playwright scripts seem to run even more stable than their already reliable Puppeteer counterparts.
- The Playwright community on GitHub, Twitter, Slack and beyond has gotten very vibrant, while Puppeteer’s has gone more and more quiet.
What to change in your scripts - short version
Below you can find a cheat sheet with Puppeteer commands and the corresponding evolution in Playwright. Keep reading for a longer, more in-depth explanation of each change.
Remember to add await as necessary.
| Puppeteer | Playwright |
|---|---|
require('puppeteer') |
require('playwright') |
puppeteer.launch(...) |
playwright.chromium.launch(...) |
browser.createIncognitoBrowserContext(...) |
browser.newContext(...) |
page.setViewport(...) |
page.setViewportSize(...) |
page.waitForSelector(selector) page.click(selector); |
page.click(selector) |
page.waitForXPath(XPathSelector) |
page.waitForSelector(XPathSelector) |
page.$x(xpath_selector) |
page.$(xpath_selector) |
page.waitForNetworkIdle(...) |
page.waitForLoadState({ state: 'networkidle' }}) |
page.waitForFileChooser(...) |
Removed, handled differently. |
page.waitFor(timeout) |
page.waitForTimeout(timeout) |
page.type(selector, text) |
page.fill(selector, text) |
page.cookies([...urls]) |
browserContext.cookies([urls]) |
page.deleteCookie(...cookies) |
browserContext.clearCookies() |
page.setCookie(...cookies) |
browserContext.addCookies(cookies) |
page.on('request', ...) |
Handled through page.route. |
elementHandle.uploadFile(...) |
elementHandle.setInputFiles(...) |
| Tricky file download. | Better support for downloads. |
Did we forget anything? Please let us know by getting in touch, or submit your own PR.
What to change in your scripts - in depth
Require Playwright package
In Puppeteer, the first few lines of your script would have most likely looked close to the following:
const puppeteer = require('puppeteer');

(async () => {
  const browser = await puppeteer.launch();
  const page = await browser.newPage();

  // ...
With Playwright you do not need to change much:
const { chromium } = require('playwright');

(async () => {
  const browser = await chromium.launch();
  const page = await browser.newPage();

  // ...
Playwright offers cross-browser support out of the box, and you can choose which browser to run with just by changing the first line, e.g. to const { webkit } = require('playwright');
In Puppeteer, this would have been done through the browser’s launch options:
const browser = await puppeteer.launch({ product: 'firefox' })
The browser context
Browser contexts already existed in Puppeteer:
const browser = await puppeteer.launch();
const context = await browser.createIncognitoBrowserContext();
const page = await context.newPage();
Playwright’s API puts even more importance on them, and handles them a little differently:
const browser = await chromium.launch();
const context = await browser.newContext();
const page = await context.newPage();
Like in Puppeteer, for basic cases and single-page flows, you can use the default context:
const browser = await chromium.launch();
const page = await browser.newPage();
When in doubt, explicitly create a new context at the beginning of your script.
Waiting
The auto-waiting mechanism in Playwright means you will likely not need to care about explicitly waiting as often. Still, waiting being one of the trickiest bits of UI automation, you will still want to know different ways of having your script explicitly wait for one or more conditions to be met.
In this area, Playwright brings about several changes you want to be mindful of:
-
page.waitForNavigationandpage.waitForSelectorremain, but in many cases will not be necessary due to auto-waiting. -
page.waitForEventhas been added. -
Puppeteer’s
page.waitForXPathhas been incorporated intopage.waitForSelector, which recognises XPath expressions automatically. -
page.waitForFileChooserbeen removed (see the official dedicated page and our file upload example for new usage) -
page.waitForNetworkIdlehas been generalised intopage.waitForLoadState(see thenetworkidlestate to recreate previous behaviour) -
page.waitForUrlhas been added allowing you to wait until a URL has been loaded by the page’s main frame.
This is as good a place as any to remind that page.waitForTimeout should never be used in production scripts! Hard waits/sleeps should be used only for debugging purposes.
Setting viewport
Puppeteer’s page.setViewport becomes page.setViewportSize in Playwright.
Typing
While puppeteer’s page.type is available in Playwright and still handles fine-grained keyboard events, Playwright adds page.fill specifically for filling and clearing forms.
Cookies
With Puppeteer cookies are handled at the page level; with Playwright you manipulate them at the BrowserContext level.
The old…
…become:
Note the slight differences in the methods and how the cookies are passed to them.
XPath selectors
XPath selectors starting with // or .. are automatically recognised by Playwright, whereas Puppeteer had dedicated methods for them. That means you can use e.g. page.$(xpath_selector) instead of page.$x(xpath_selector), and page.waitForSelector(xpath_selector) instead of page.waitForXPath(xpath_selector). The same holds true for page.click and page.fill.
Device emulation
Playwright device emulation settings are set at Browser Context level, e.g.:
const pixel2 = devices['Pixel 2'];
const context = await browser.newContext({
  ...pixel2,
});
On top of that, permission, geolocation and other device parameters are also available for you to control.
File download
Trying to download files in Puppeteer in headless mode can be tricky. Playwright makes this more streamlined:
const [download] = await Promise.all([
  page.waitForEvent('download'),
  page.click('#orders > ul > li:nth-child(1) > a')
])

const path = await download.path();
See our example on file download.
File upload
Puppeteer’s elementHandle.uploadFile becomes elementHandle.setInputFiles.
See our example on file upload.
Request interception
Request interception in Puppeteer is handled via page.on('request', ...):
await page.setRequestInterception(true)

page.on('request', (request) => {
  if (request.resourceType() === 'image') request.abort()
  else request.continue()
})
In Playwright, page.route can be used to intercept requests with a URL matching a specific pattern:
await page.route('**/*', (route) => {
  return route.request().resourceType() === 'image'
    ? route.abort()
    : route.continue()
})
See our full guide on request interception for more examples.
For many of the points in the list above, variations of the same function exist at Page, Frame and ElementHandle level. For simplicity, we reported only one.
New possibilities to be aware of
When moving from Puppeteer to Playwright, make sure you inform yourself about the many completely new features Playwright introduces, as they might open up new solutions and possibilities for your testing or monitoring setup.
New selector engines
Playwright brings with it added flexibility when referencing UI elements via selectors by exposing different selector engines. Aside from CSS and XPath, it adds:
- Playwright-specific selectors, e.g.:
:nth-match(:text("Buy"), 3) - Text selectors, e.g.:
text=Add to Cart - Chained selectors, e.g.:
css=preview >> text=In stock
You can even create your own custom selector engine.
For more information on selectors and how to use them, see our dedicated guide.
Saving and reusing state
Playwright makes it easy for you to save the authenticated state (cookies and localStorage) of a given session and reuse it for subsequent script runs.
Reusing state can save significant amounts of time on larger suites by skipping the pre-authentication phase in scripts where it is not supposed to be directly tested / monitored.
Locator API
You might be interested in checking out Playwright’s Locator API, which encapsulates the logic necessary to retrieve a given element, allowing you to easily retrieve an up-to-date DOM element at different points in time in your script.
This is particularly helpful if you are structuring your setup according to the Page Object Model, or if you are interested to do start doing that.
Playwright Inspector
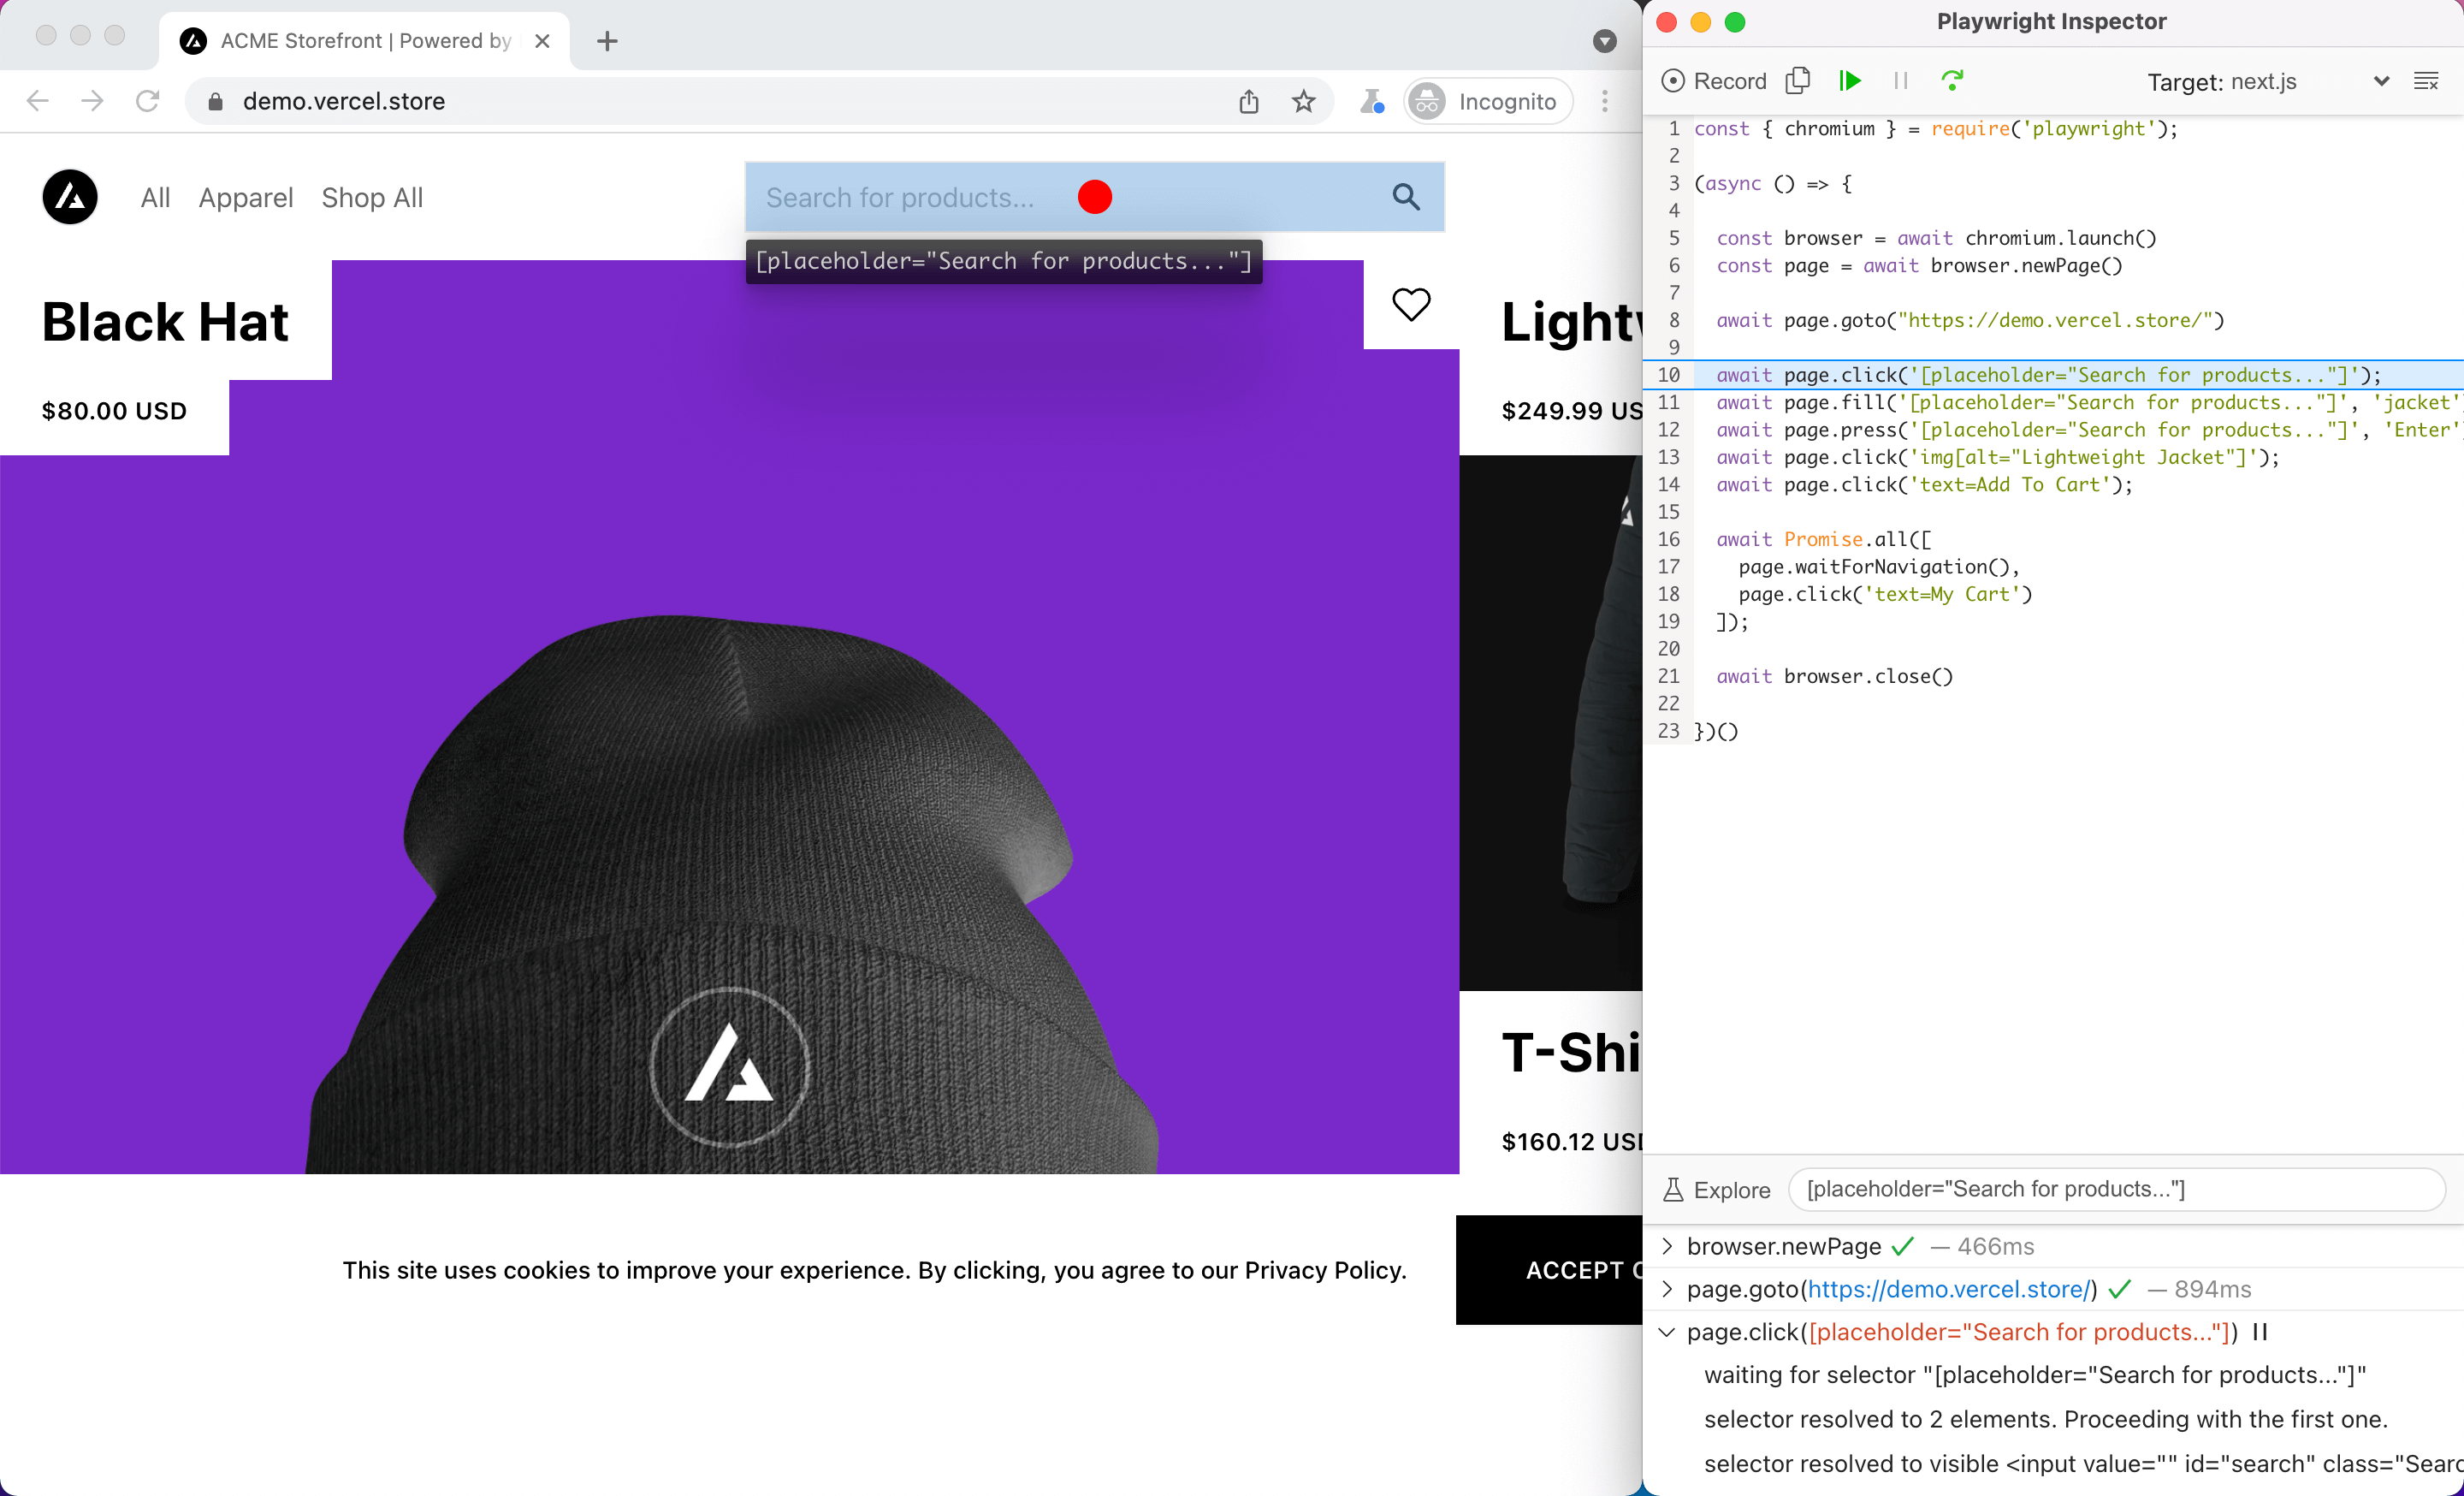
The Playwright Inspector is a GUI tool that comes in very handy when debugging scripts, allowing you to step instruction-by-instruction through your script to more easily identify the cause of a failure.

The Inspector also comes in handy due its ability to suggest selectors for page elements and even record new scripts from scratch.
Playwright Test
Playwright comes with its own runner, Playwright Test, which adds useful features around end-to-end testing, like out-of-the-box parallelisation, test fixtures, hooks and more.
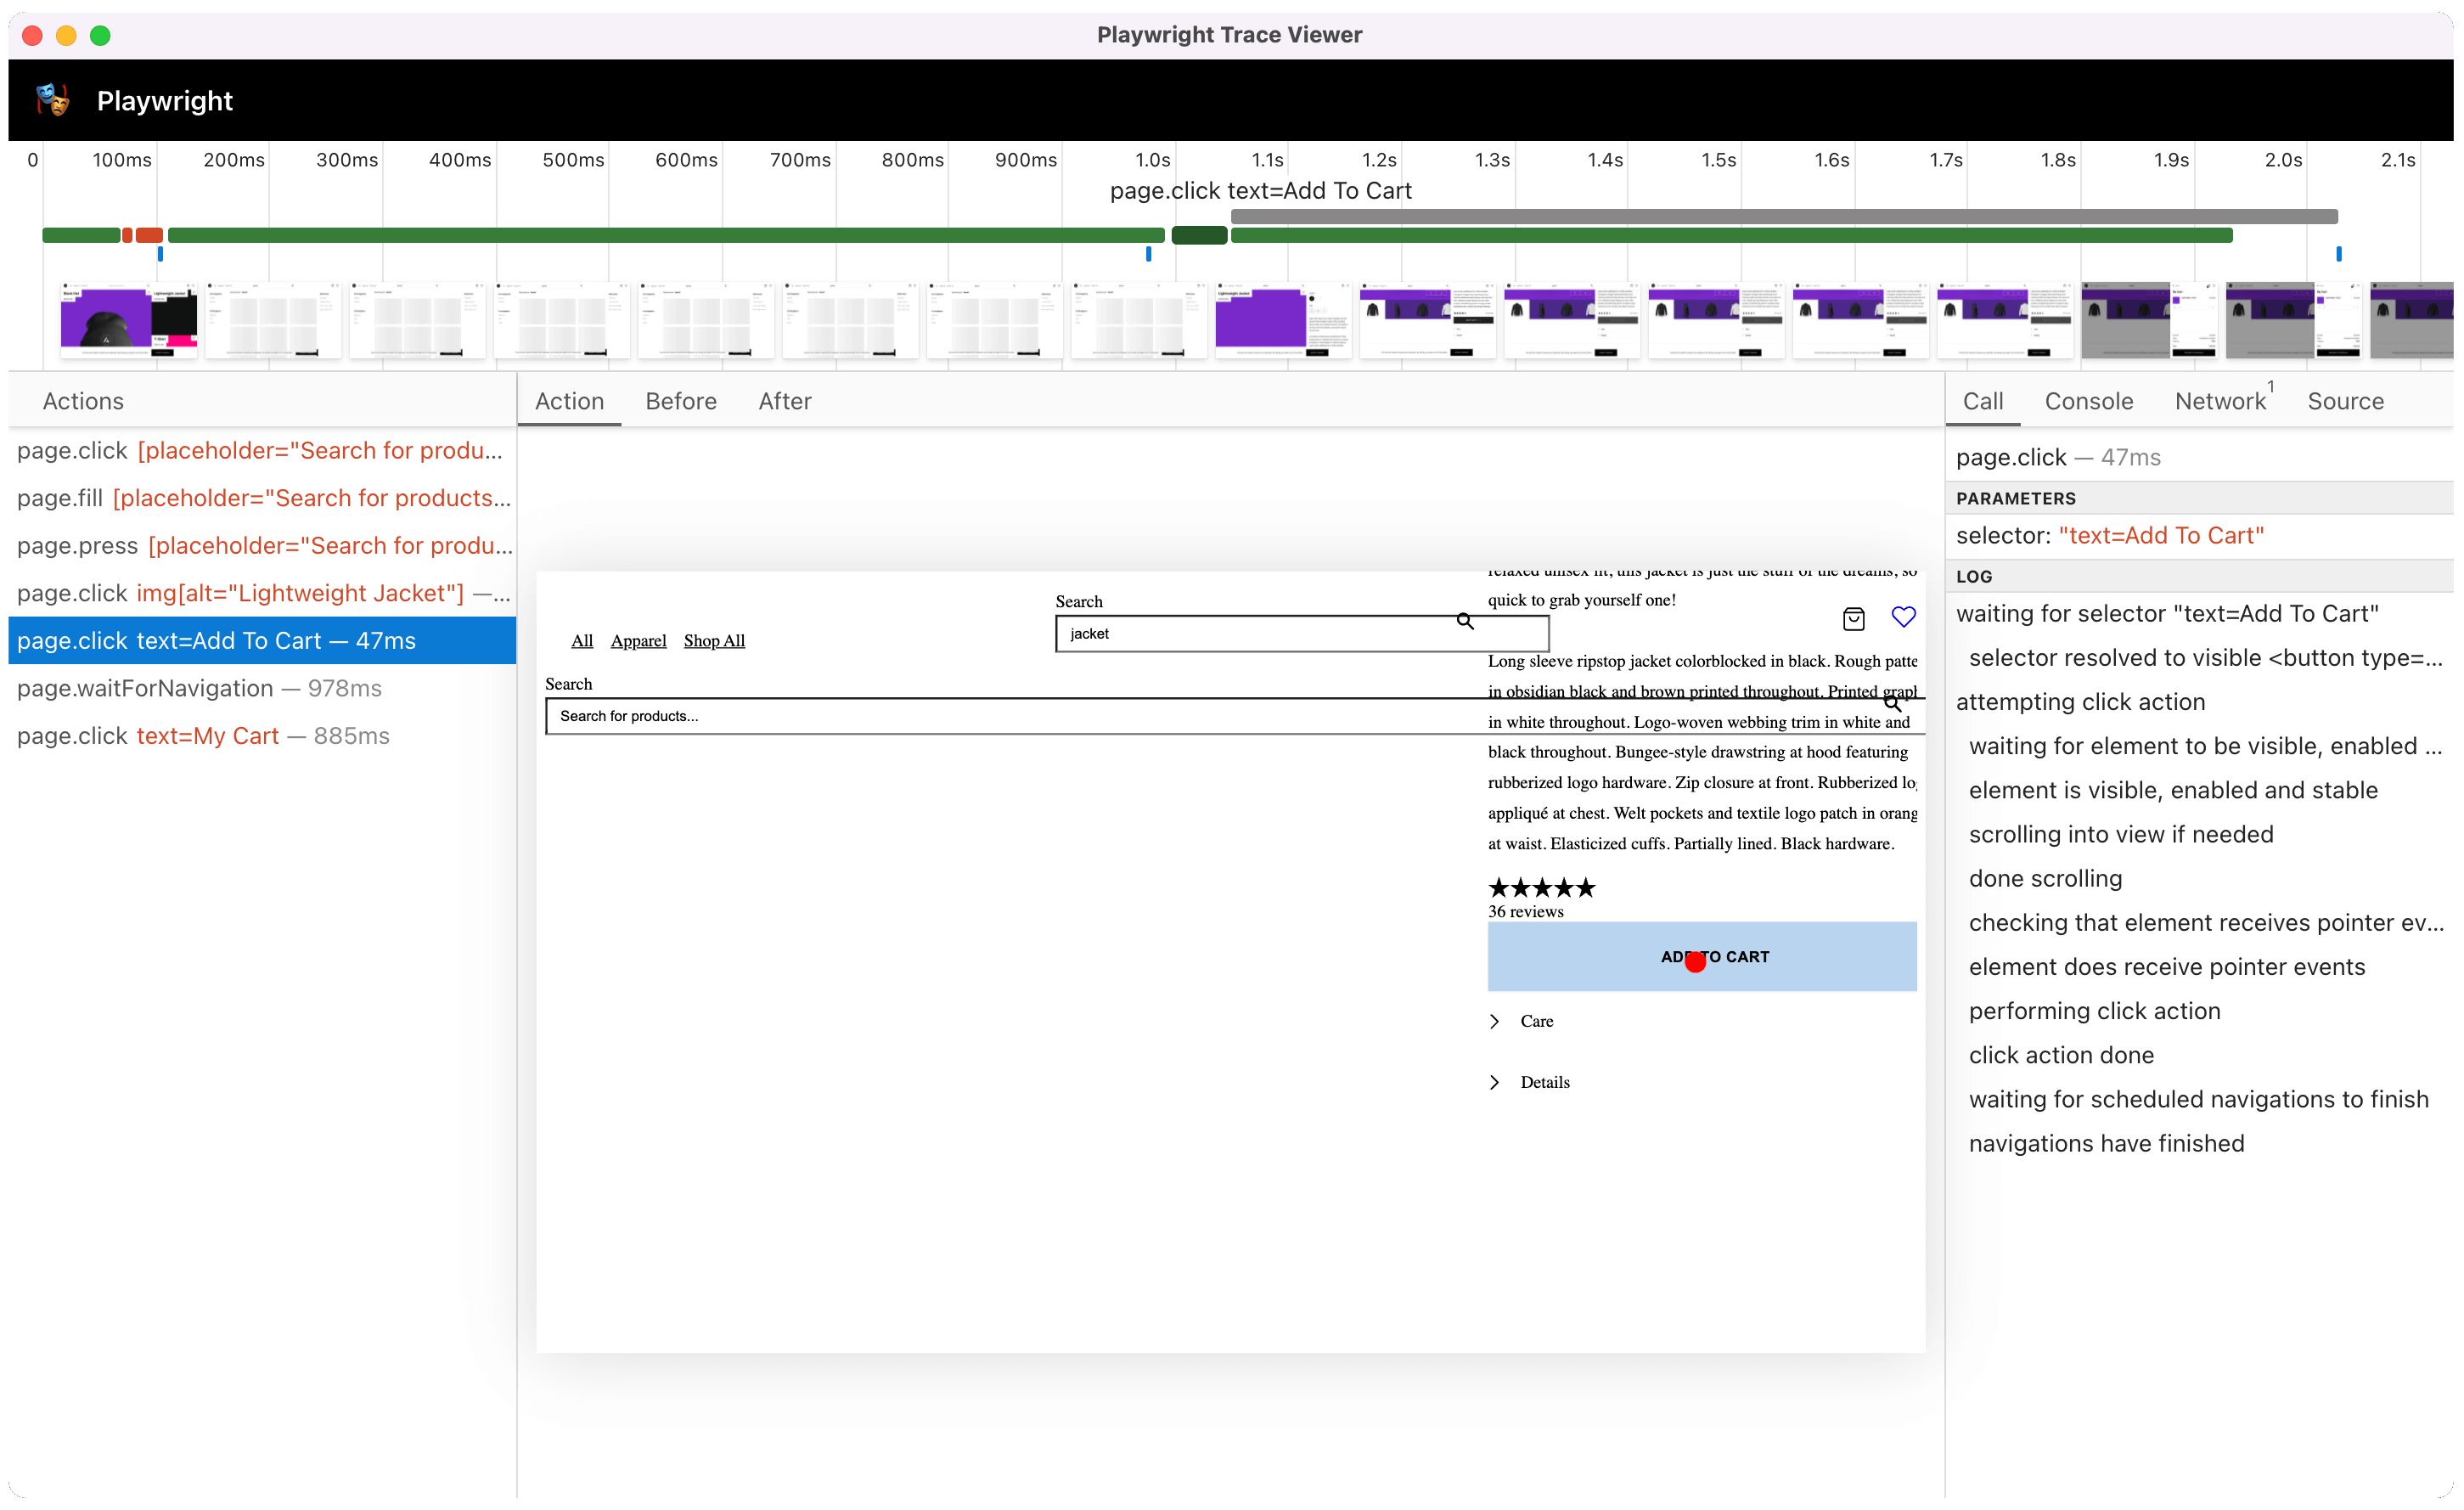
Trace Viewer
The Playwright Trace Viewer allows you to explore traces recorded using Playwright Test or the BrowserContext Tracing API. Traces are where you can get the most fine-grained insights into your script’s execution.

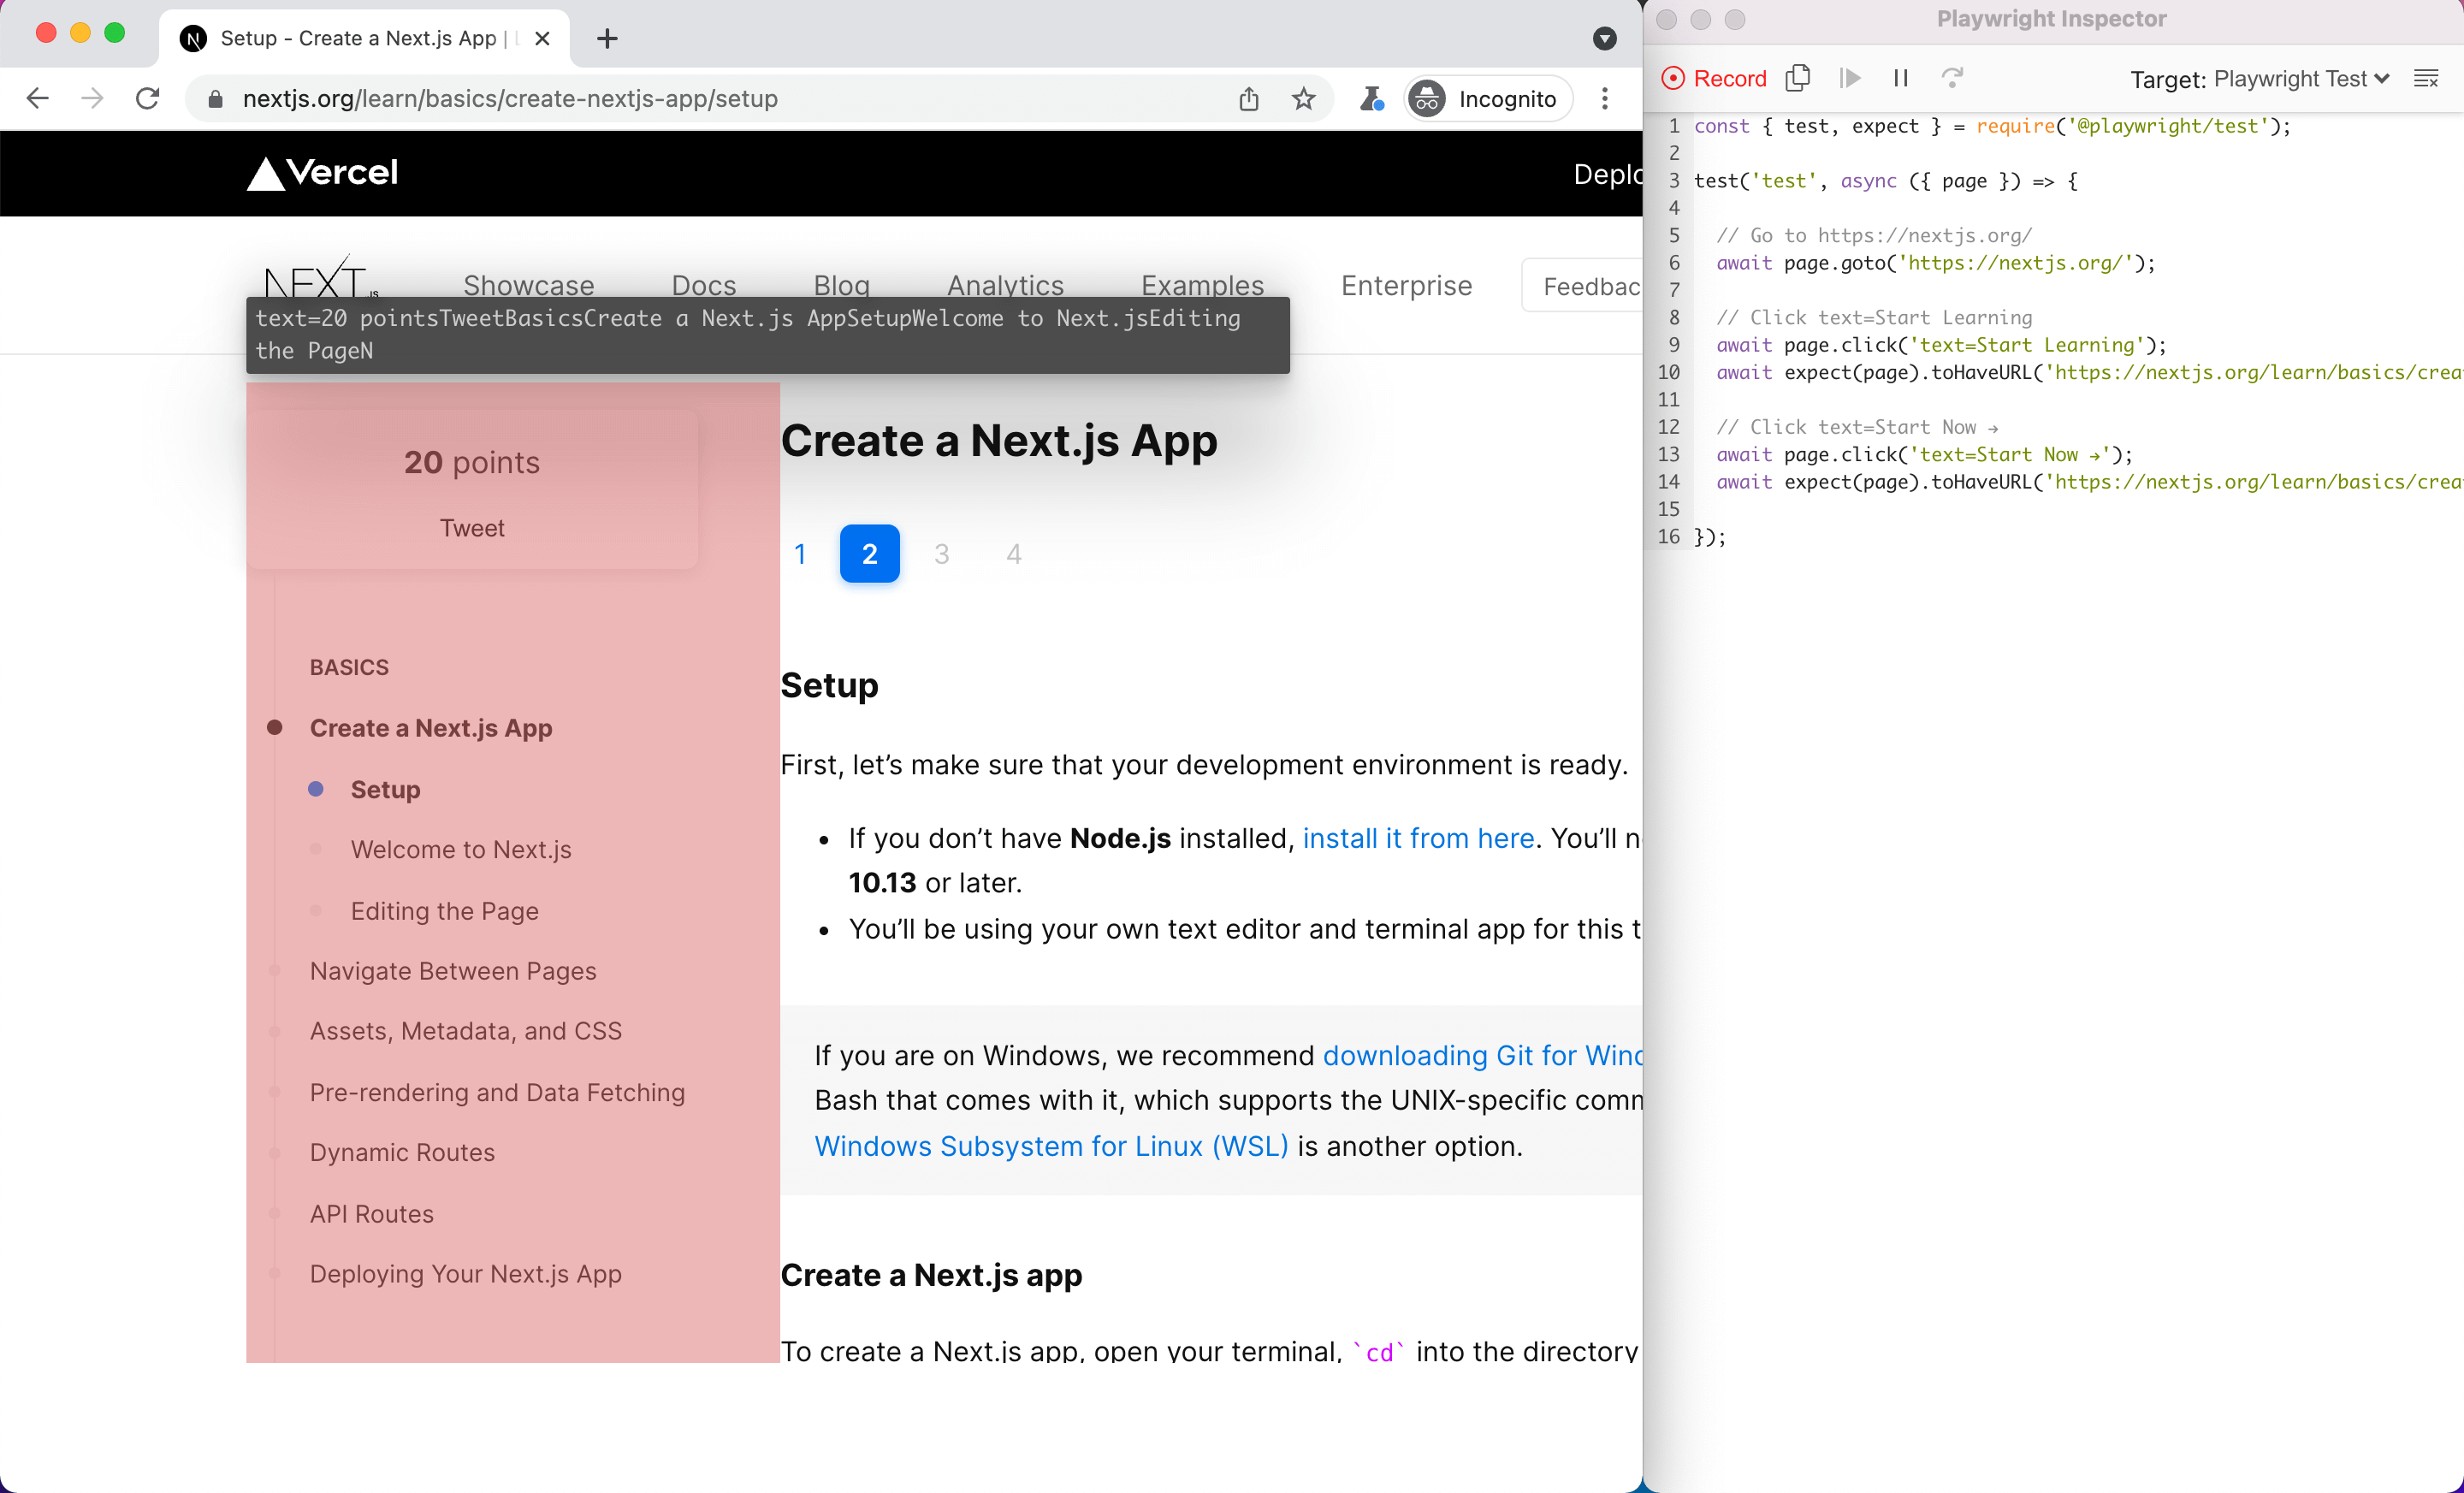
Test Generator
You can use the Playwright Test Generator to record interactions in your browser. The output will be a full-fledged script ready to review and execute.

Switching to Playwright for richer browser check results
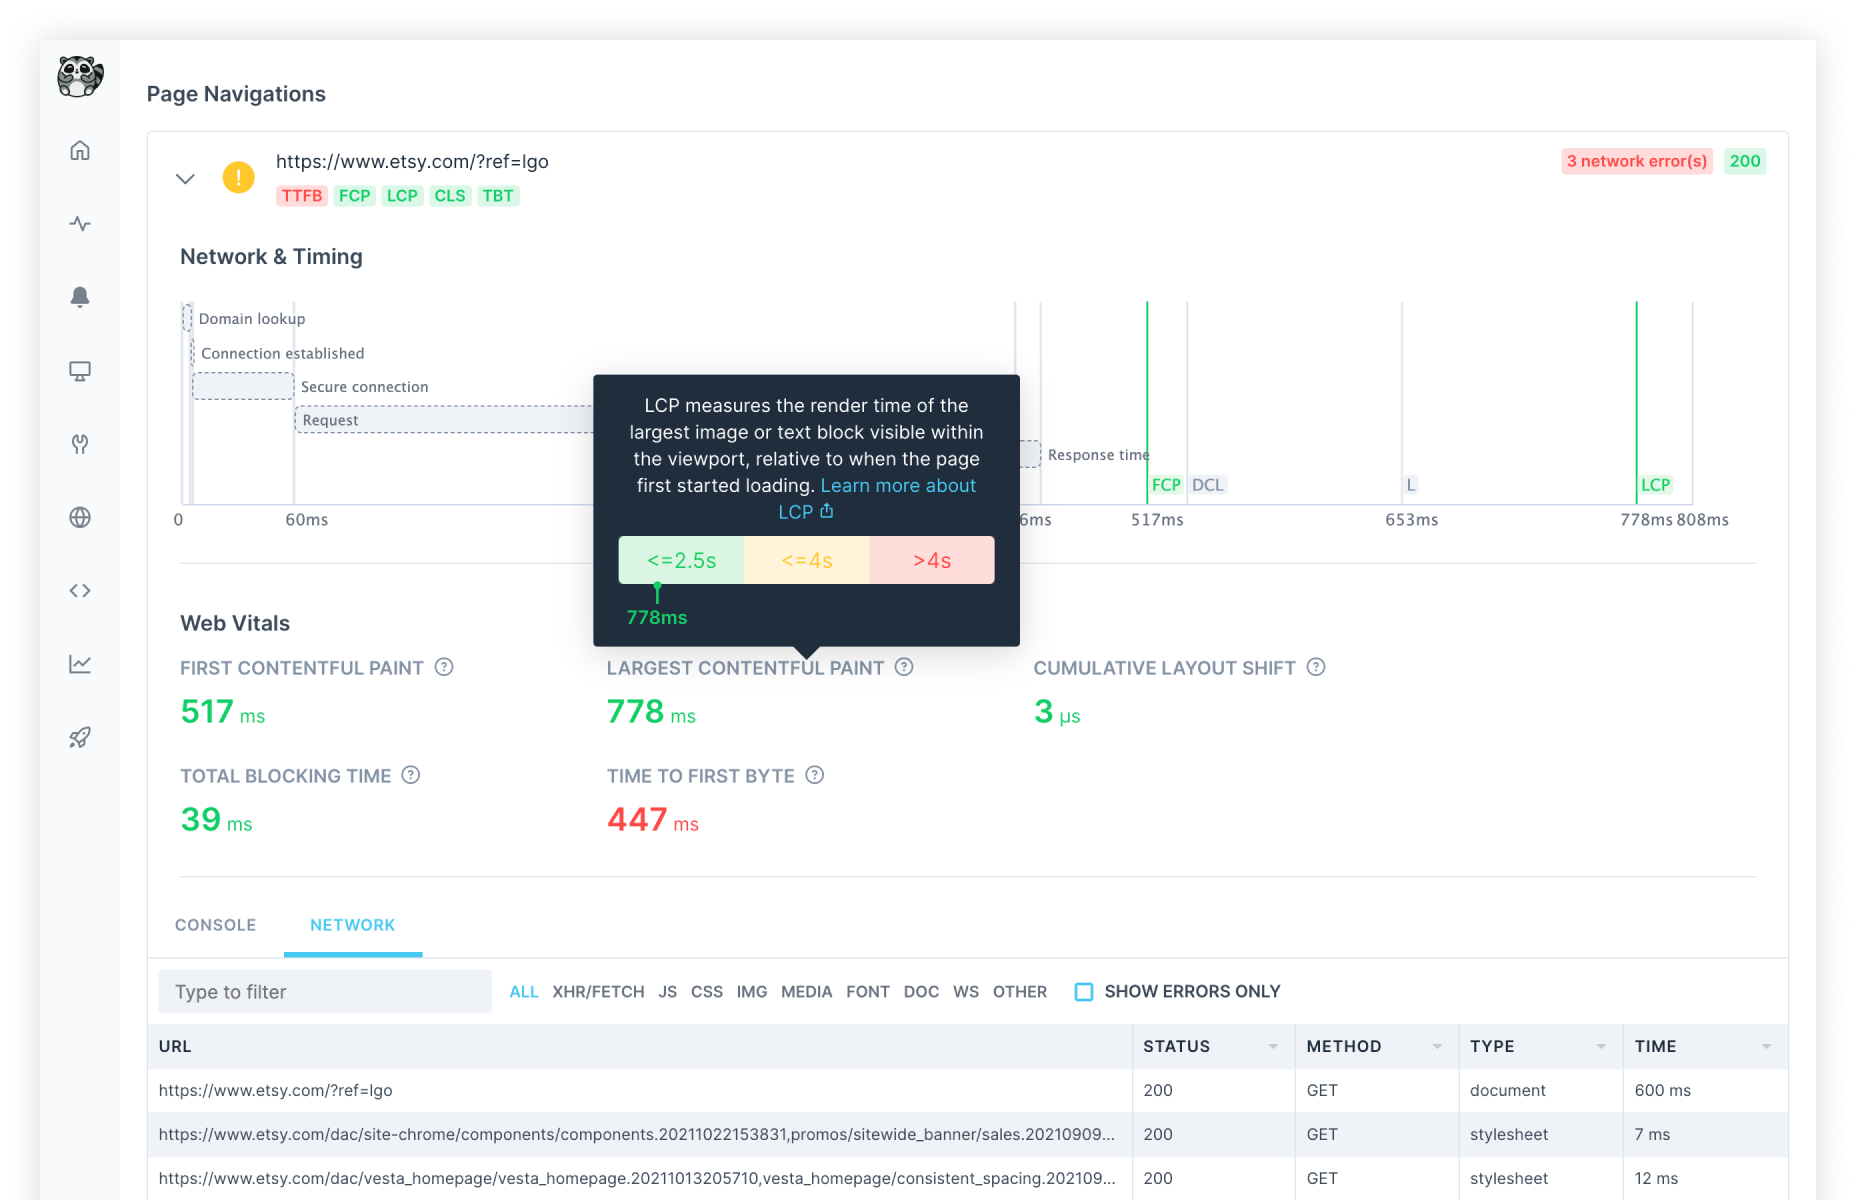
Checkly users switching to Playwright can take advantage of its new Rich Browser Check Results, which come with tracing and Web Vitals and make it easier to isolate the root cause of a failed check and remediate faster.

This reveals additional information about the check execution, including:
- Overview of all errors raised (console, network and script errors)
- A timeline summarising the execution across page navigations
- For each page visited, a network & timing timeline, Web Vitals, console and network tabs.
- In case of a failing check, a screenshot on failure.
Aside from running a Playwright script, performance and error tracing also require the use of Runtime 2021.06 or newer.
Note that cross-browser support is not available on Checkly - our Browser checks run on Chromium only.
Read More
Checkly CLI
Understand monitoring as code (MaC) via our Checkly CLI.
End to end monitoring
Learn end-to-end monitoring with puppeteer and playwright to test key website flows.
OpenAPI/Swagger Monitoring
OpenAPI and Swagger help users design and document APIs in a way that is readable from both humans and machines.